
How to Draw a Chicago Blackhawks Logo
 First Step
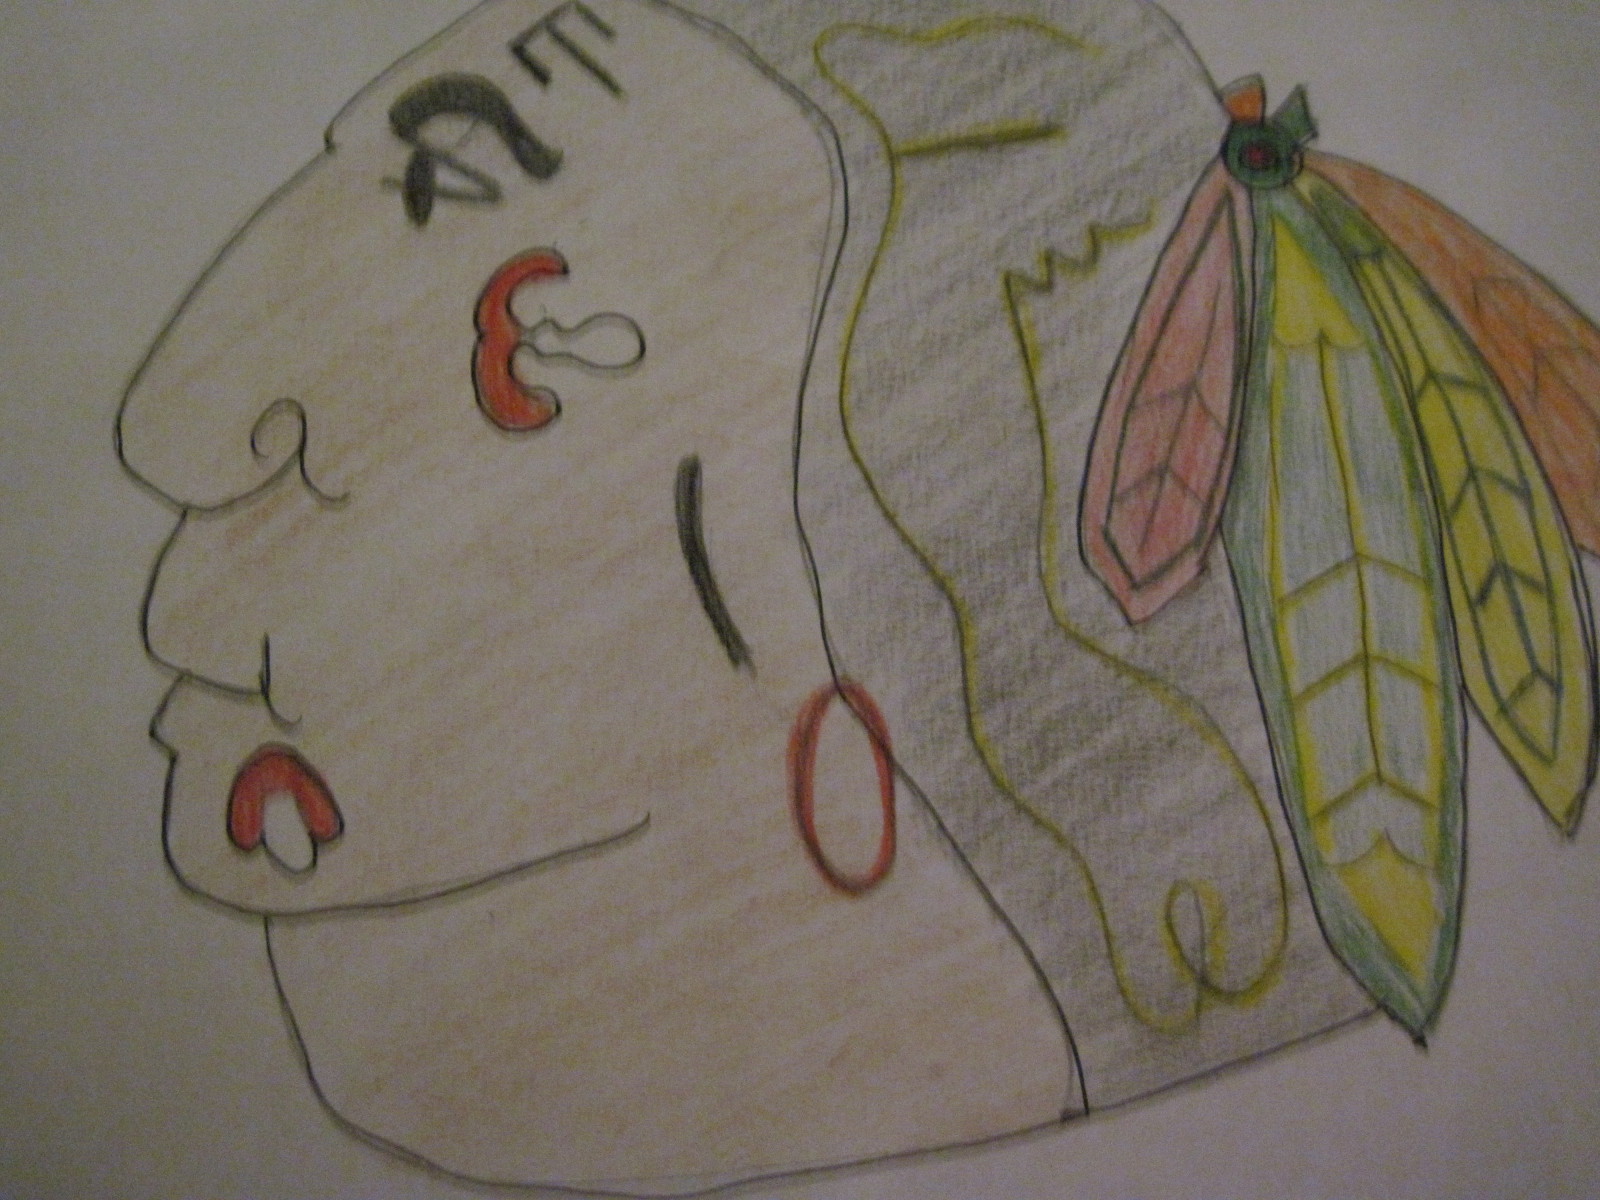
Start by drawing the outline for the Blackhawks head. Outline the face and the hair; leave the feathers alone for the moment.
Second Step
At the indent for the forehead, draw the thick eyebrow. Just under the eyebrow, draw a dark slated straight line. Connect that line with a straight line towards the nose. Draw a faint line from the eyelid to the eyebrow. Then finish with the long oval for the pupil.
Third Step
Draw in the facial markings. Start by the top hairline with the weird looking T; make it look dark. Then add the face paint with the red and white.
Fourth Step
Draw in the red earring. Then draw the thick black line for the ear.
Fifth Step
Draw the feathers individually. Start with the red feather. Draw in the leaf features. Move on to the green feather. Draw in the leaf features. Then the yellow feather and draw in its features. Finish off with the orange feather. Finish the look by connecting the hair to the bottom of the green feather. Also, add the circle that connects the feathers and the excess tops of the feathers.
Sixth Step
Add the lines in the hair, make sure they are plenty curvy and have a loop at the bottom.
Seventh Step
Add the colors in the right places to finish the entire logo. For the edgy effect, outline the entire logo in black.
Congrats, you drew your very own Blackhawks Logo!
Latest tutorials
-

DIY Home Canvas
May 24th, 2014 at 09:41pm
-

52 Things I Love About You
December 26th, 2013 at 05:24pm
-

Fluorescent Jars
November 7th, 2013 at 04:41am
-

DIY Canvas Poster
August 20th, 2013 at 08:26pm
-

How to Draw a Picture
February 23rd, 2013 at 07:41pm