
How to Make Crayon Art
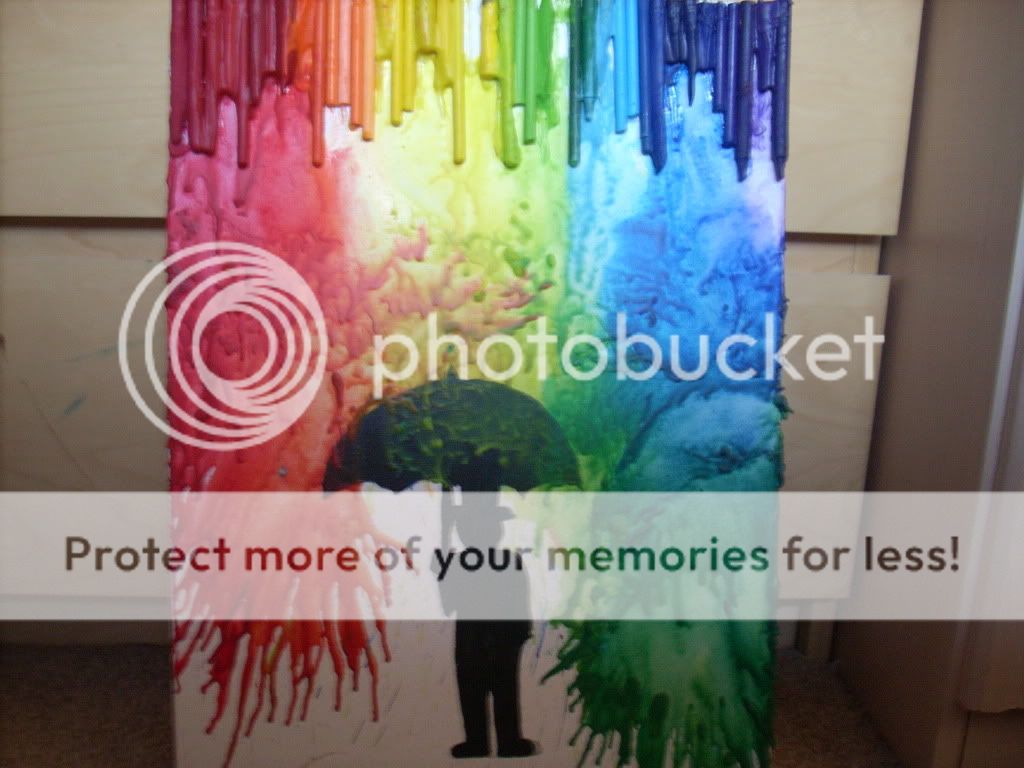 This is a tutorial on how to make a picture like the one on your left. It's a piece I made myself and was very fun to create and I was extremely pleased with how it turned out.
You Will Need
- a canvas
- paint of your choice (preferably black and acrylic - it's also optional whether you have paint or not, but I'll get to that later on)
- a hot glue gun
- crayons (around 2 packets of Crayola)
- a hair dryer
- a few sheets of newspaper
Step One
First, you'll need to decide whether you want a picture on your canvas or not. I chose to paint a little man with an umbrella so it looked like the melted crayon was rain, but it's up to you. If you chose to have a picture on your canvas, I would suggest painting it in black to make it stand out better.
Once you've painted your image on to your canvas and it's dried, you need to sort out your crayons.
Step Two
Because I was lazy and couldn't be bothered buying new packs of crayons, I just hunted around my house until I found enough crayons. I would suggest you buy at least two packets of crayola-or another brand of crayon, whatever you want- but how many crayons you have will dependson how big your canvas is. Once you have our crayons, sort out what colours you want. Personally, I think it looks better with rainbow coloured crayons, but again, it's your choice. Once you've decided what colours you want, you can start to glue down your crayons.
Step Three
Arrange your crayons into the order you want them before you stick them down. Before I arranged them, I stuck down a red crayon at one end of my canvas and a purple on at the other. You'll want to have a few crayons of each colour to make sure it fills up the space. Heat up your glue gun-this normally takes no more than 5 minutes- and start by putting a line of glue onto one side of your crayon and then stick it down on the top of your canvas or wherever you prefer.
My glue gun only cost me around £7-sorry if you have another currency!-and they're quite easy to find. You can buy them at arts and crafts shops or at department shops like the Range or B&Q.
If you're leaving the paper on your crayon you're fine to glue it on the paper, but if you decide to peel all the paper off like I did, then make sure you glue a strip on your canvas and NOT on your crayon because the glue will just melt into the crayon.
Step Four
Once you've glued down your crayons in the order you want, make sure every single crayon is definately stuck down on your canvas. Leave it alone for 5 minutes to definately make sure everything has dried and is securely stuck to your canvas. Set out the pages of your newspaper and set your canvas on it. I'd suggest wearing old clothes you don't mind getting dirty because this step is messy!
Plug in your hair dryer and set it on full power and full heat. Aim your hair dryer at your crayons in a downwards direction to make sure the crayons will melt downwards. If you have a painting on your canvas, I'd suggest covering it up to make sure it doesn't get melted crayon on it.
The crayons won't take long to melt. Make sure you go across the row of crayons to ensure they're all melting. You'll be able to see your progress as you go along. Be careful of hot wax! I got quite a few splatters of melted crayon on my arms and it hurts quite a bit.
Blow the melting crayons in the direction you want. You can make things interesting by mixing the crayons together by blowing them across the canvas into each other to make different colours and shades.
Step Five
Once you're satisfied that your crayons have been melted how you want, you're done. Leave your picture alone for a while to make sure the crayons are finished melting, but you shouldn't have to wait too long because the wax dries almost immediately. Melting your crayons may take quite a while, but the end result is worth it!
Have fun and go and make pretty pictures! :)
Latest tutorials
-

DIY Home Canvas
May 24th, 2014 at 09:41pm
-

52 Things I Love About You
December 26th, 2013 at 05:24pm
-

Fluorescent Jars
November 7th, 2013 at 04:41am
-

DIY Canvas Poster
August 20th, 2013 at 08:26pm
-

How to Draw a Picture
February 23rd, 2013 at 07:41pm