
How to Make an Origami Flower
I have an unhealthy crafting obsession, so I decided that I’d put it to use by making a tutorial on how to make an origami flower. No origami paper required.
If you don’t have origami paper, you don’t need a ruler either. So here’s a quick pre-step.
Preface:
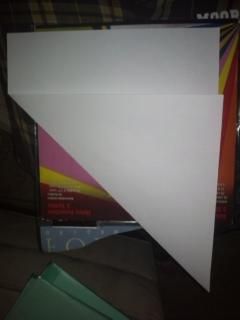
Take the page and fold so one edge is lined up against the other. The excess paper at the end is what you can get rid of.
One:
Because I’m weird and have origami paper laying around, I’m switching over to that.
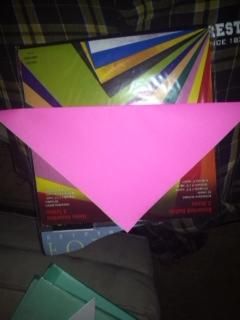
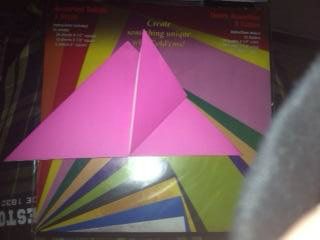
Fold the paper diagonal so the corners meet. Do this again going the other way.
Two:
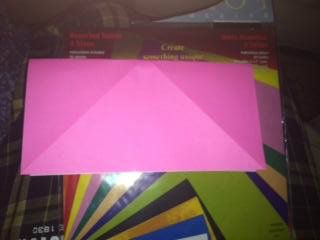
Fold the paper in half. You should see the outlines of your previous creases.
Three:
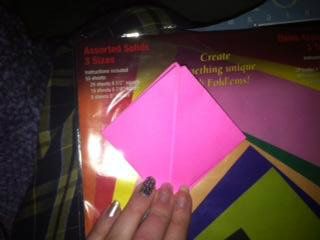
Tuck the two sides under the triangle that’s outlined by the creases.
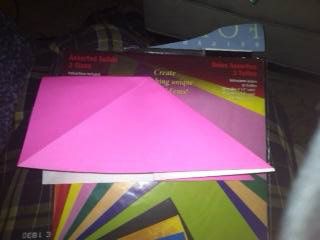
You should be left with a triangle.
Four:
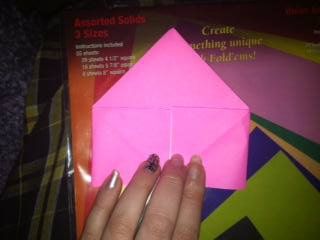
Lift the corner of the triangle so it reaches the top. Crease it. Repeat with other side.
Five:
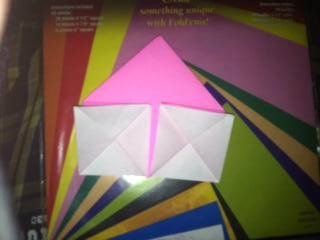
Now, separate the two smaller triangles by pressing them down to make two small squares. The whole thing should look like a pentagon shape.
Six:
Fold the corners of the squares up on each side.
Seven:
Make the middle diamond into a rectangle by pulling on the middle of either little pieces and creasing.

Tuck the rectangle under each of the flaps. Do this with all the sides.
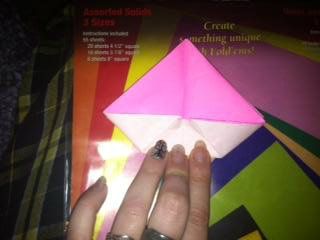
Eight:
Stand the will-be-flower up. Fold the tip of the flower to either side, and then fold it into the piece.


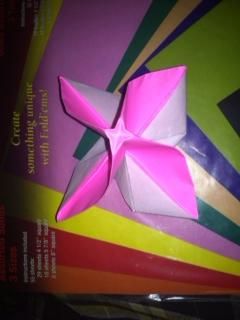
Nine:
Take opposite sides of the flower, and bend them in opposite directions, one toward you, one away from you.
When it resembles a flower, put your fingers between each of the petals and twist it.
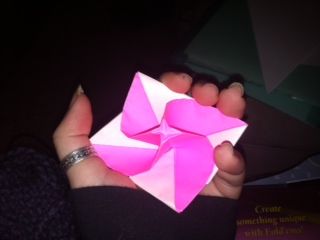
Ten:
Ta da! You’ve alleviated your boredom for a couple of minutes.
Latest tutorials
-

DIY Home Canvas
May 24th, 2014 at 09:41pm
-

52 Things I Love About You
December 26th, 2013 at 05:24pm
-

Fluorescent Jars
November 7th, 2013 at 04:41am
-

DIY Canvas Poster
August 20th, 2013 at 08:26pm
-

How to Draw a Picture
February 23rd, 2013 at 07:41pm