
How to Make a Blue Hued Icon Using Photoshop
 Everyone, at some point, likes to have a pretty and creative icon; whether it be for your avatar, or as a story image. You can go to photobucket or another picture hosting website and try to get your desired colors there, or you can do it yourself, and get exactly what you're looking for.
I'm going to show you how to do that, using this coloring.
Step One:
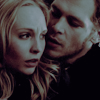
First off you’ll need your image. I’m going to use this one from Pink Blossom.
Step Two:
Now that you have your image, take it and make a new layer. Fill that layer with the color #6a398f.

Set it to Pin Light at 53%.
Step Three:
Now create a new layer, and fill it with the color #8992ae.

Set it to color at 50%.
Step Four:
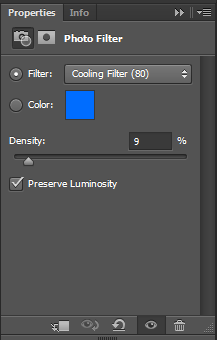
Create a Photo Filter Layer.
Set it to Cooling Filter (80). Density: 9%
Step Five:
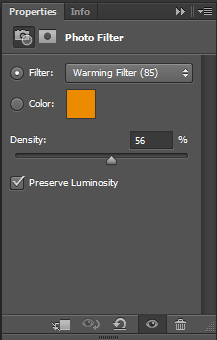
Create another Photo Filter Layer.
Set it to Warming Filter (85). Density: 56%
Step Six:
Create a Curves Layer.
Now match your settings to mine. Red: 54, 68 199, 147

Step Seven:
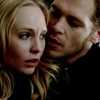
You're done! Your finished icon should look like the one below. If you have any issues or concerns, or would just like to ask a question, feel free to message me!

Latest tutorials
-

How to Make a Simple Banner in GIMP
January 25th, 2014 at 05:29am
-

How to Successfully Code a Signature for Mibba
August 10th, 2013 at 08:32am
-

How to Make a Blue Hued Icon Using Photoshop
February 1st, 2013 at 06:38am
-

How to Change Light Hair Color on GIMP
July 23rd, 2012 at 01:37am
-

How to Make a Mibba Story Layout
July 20th, 2012 at 08:19am