
How to Skateboard
The Parts of a Skateboard
The first thing you should know about skateboarding is the board itself and how it works.
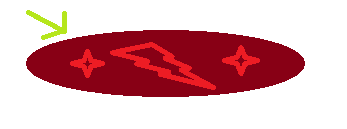
The deck of a skateboard is made up of about 6 pieces of thin wood (usually maple) that are pressed together tightly with the help of a machine. The bottom part of the deck usually has a pattern or image of some kind painted onto it.
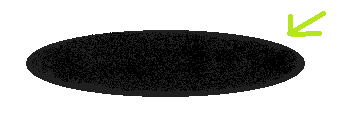
The grip tape is the blackish material that sticks on top of the deck. It has the texture of sandpaper and its purpose is to keep your feet from sliding off the board.
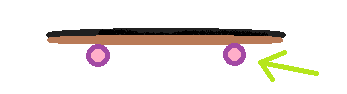
The wheels of the skateboard should be made of a material called polyurethane. Wheels come in many different sizes and shapes for different types of skating. Larger sizes like 54–85mm roll faster, and also move more easily over cracks in pavement. Smaller sizes like 48–54mm keep the board closer to the ground, require less force to accelerate, and produce a lower center of gravity... but have slower speed. Wheels are also available in a variety of hardnesses. The “hardness” of the wheels is usually measured on the Shore durometer "A" scale. Wheels range from the very soft (about Shore A 75) to the very hard (about Shore A 101).

The trucks are the two metal (usually aluminum alloy) parts that connect the wheels to the deck and provide the general movement of the board. The trucks are made of two main parts. The top part of the truck is screwed to the deck and is called the baseplate. Beneath the baseplate is the hanger. The axle runs through the hanger. Between the baseplate and the hanger are bushings. Bushings provide the cushion for turning and landing tricks. The stiffer the bushings, the more resistant the skateboard is to turning. The softer the bushings, the easier it is to turn. Attaching extra bushings to your board is optional. A bolt called a kingpin holds all of these parts together and fits inside the bushings. By tightening or loosening the kingpin, the trucks can be adjusted loosely for better turning and adjusted tighter for more stability.

Each skateboard wheel is connected to its axle by two metal parts called bearings. With few exceptions, the bearings are the industrial standard "608" size, with a bore of 8mm, an outer diameter of 22mm, and a width of 7mm.
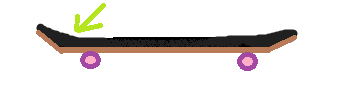
Almost all skateboards also have a concave. The concave of the board is the upward curve on each end of the deck. There are many different degrees of concave. Some are barely noticeable, while others are quite steep. A deeper concave will usually make tricks easier to perform, while a shallower concave will usually allow for easier vert skating. Most of the time one side of the board will have a slightly deeper concave than the other; this side is the called the tail (the back), while the opposite side is called the nose (the front). Experiment to see what degree of concave feels best for you.
Getting Started
Now that you know all about your board, you should start by getting comfortable with it and figuring out your preferred way of riding.
Regular Stance & Push
The first and most common skateboarding stance is simply called regular. If you push regular, it means that you push with your right foot, and are therefor most likely right-footed.
Goofy Stance & Push

The second stance is called goofy. If you push goofy, it means that you push with your left foot, and are therefore most likely left-footed.
Mongo Stance & Push
There is also a third stance called “mongo” that some skaters may use. In mongo stance, you push off with your planted foot on the back part of the deck instead of the front part. This stance is incorrect and can cause problems with controlling the board.
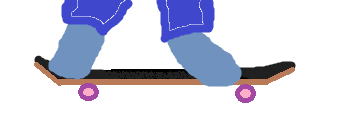
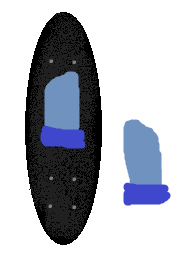
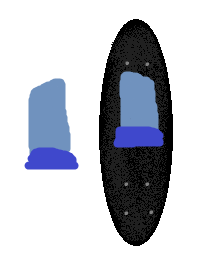
To properly push off, you should have one foot (the opposite foot of the one you will push with) planted on the front part of the deck, just behind the first pair of bolts or slightly behind the second pair of bolts. Whatever feels the most comfortable is fine. This foot should be positioned vertically. Your other foot should be planted on the ground, as this is the one you will be pushing off with. Take a moment to find your balance and then practice lifting up your “pushing foot” onto the board. This foot should be positioned horizontally on the deck. After you lift your pushing foot onto the board, then you can rotate your front foot so that it is now positioned horizontally as well. Repeat these motions until you can do them confidently. Now you're ready to take your first step!
With your front foot vertical on the board and your back foot on the ground, push off. You can push off for as many steps as you want before you place your back foot onto the board. The faster you go, the less likely you will fall; kind of like riding a bike (even though it's scary at first.) As you're rolling along now, quickly pick up your back foot and plant it onto the board confidently. You have to commit to it or you'll have a greater chance of falling. As you're still rolling with both feet on the board now, quickly turn your front foot so that it is horizontal. Or simply angle it slightly so that it doesn't feel awkward; this motion can be difficult to master at first.
The next step is learning how to turn. You'll quickly realize that you cannot ride for very long without running into the grass, the curb, or some other obstacle. The solution is turning! There are two different ways to turn, the first method being easier but the second method proving able to turn much sharper angles.
For the first method of turning, simply press your weight and tilt your feet in the direction you would like to turn. So, if you want to turn left, and you push regular, press your weight onto the heels of your feet. If you want to turn left, and you push goofy, press your weight onto the balls of your feet. The board should feel like it's tilting underneath you. The greater the tilt is, the sharper your turn will be. But keep in mind that this method of turning is going to be slow and steady; not meant for extremely sharp turns. It'll take some time to master this, so don't get frustrated with yourself if you can't seem to get it.
For the second method of turning, you have to set up your back foot so that it is positioned close to the very edge of the tail. As you're rolling along, press your weight onto your back foot so that the front wheels come off the ground slightly. Now quickly jerk the weight of your legs in the direction you wish to turn; your board should then follow your weight. The more you jerk your legs, the more your board will turn. This method of turning can result in 360 degree angle turns or more, so be prepared to keep your balance.
Learning Tricks
There are four different main types or categories of skateboarding tricks: aerials, flip tricks, slides/grinds, and manual tricks.
Aerials involve floating in the air while using a hand to hold the board on your feet or by not keeping constant and careful pressure on the board with the feet to keep it from floating away. This category includes the Nollie and all of its variations, Varials, twists, grabs, and airs.
Flip tricks are a subset of aerials which are all based on the Ollie. An example is the Kickflip, the most widely known and performed flip trick. This category also includes frontside 180, backside 180, heelflip, pop shuv it, impossible, hard flip, casper flip, and the sex change. These tricks are the most popular among street skateboarders.
Slides and Grinds involve getting the board up on some type of ledge, rail, or coping and sliding or grinding along the board or trucks. When it is primarily the board which is contacting the edge, it's called a slide; when it's the truck, it is a grind.
Manual tricks are performed by balancing the board while riding on either the two front or rear wheels, suspending the opposing wheels in the air. There's nose manuals, where you balance on your back wheels as you ride while your front wheels are raised in the air. There's tail manuals, where you balance on your front wheels as you ride while your back wheels are raised in the air. And then there's one-footed manuals, where, yes... you balance on one foot with two wheels in the air as you ride.
If you want to start learning tricks, the one you should learn first is the Ollie, since so many other tricks involve and revolve around Ollies. An Ollie is a stationary trick as well as a moving trick, meaning that you can Ollie while standing still on your board or while riding on your board. Both are done the same way.
To begin an Ollie, your front foot should be placed at an angle between the first set of bolts and the middle of the board. Wherever it feels most comfortable is fine, though I would recommend placing it just above the middle of the board. Your back foot should be placed at an angle on the edge of the tail, your heel hanging off the back of the deck just slightly. The bigger your foot is, the more your heel will hang off.
The next step is bending your knees; the lower you crouch, the higher your Ollie will be once you jump it. Now pop your tail down by pressing a quick burst of weight onto your back foot. As you do this, lift your front foot so that it is bent at the ankle. Now slide your front foot forward and jump as high as you possibly can. You should be doing this all very quickly and at the same moment. Be sure to commit to the trick and don't be afraid to fall.
If done correctly, your board should float in the air for a split second and then you should land the Ollie with your feet on the bolts. If you can't tell whether you're doing it correctly or not, try asking someone to watch and see if all of your wheels lift off the ground, or video tape yourself doing the trick and watch it to see how you can improve.
Once you master the Ollie and can land it fairly consistently, you're ready to move on to more tricks. Looking up trick videos is a great way to get started, and remember to keep practicing.
Good luck!
Latest tutorials
-

Five Tips on How to Save Money
September 24th, 2016 at 10:35am
-

How to Survive With a Broken Knee
February 9th, 2016 at 08:21pm
-

Winterproof Body Lotion
February 11th, 2015 at 02:53am
-

Saving Money During the Holidays
December 21st, 2014 at 09:02pm
-

DIY Wine Glasses
May 30th, 2014 at 06:30pm