
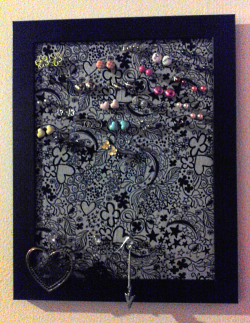
DIYers: Framed Jewelry Board
The holidays are here, and you know what that means? Crazy crowds, lots of lines, and angry, frustrated consumers (not to mention, all the money you'll be spending). So why don't you save yourself the trouble (and possible injury) and try your hand at homemade holiday gifts for your closest friends and family?
If you're new to the DIY (Do It Yourself) world, this framed jewelry board is the perfect project to get you started.
 What I Bought
(and what it cost)
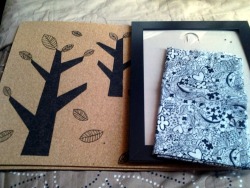
- 1- cork tablemats (4.99/4 @ Ikea)
- 1- 8" x 10" picture framer ($1.99)
- 1- rectangular piece of fabric , at least 10" x 12" ($0.97 per precut square, each square can make 2 of these jewelry board)
Total: for 1 board - less than $4
What You'll Also Need
(Invest in these products because you can use them for many projects. I've been working with these same glues for about eleven or so projects and I haven't made a dent in them yet.)
- spray adhesive
- Gorrilla Glue - or some other strong liquid glue
- scissors/box cutter/Xacto knife
- ruler
What You'll Do
Step 1: Prep your cork tablemat
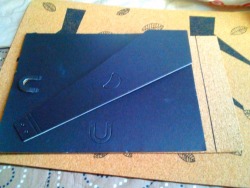 Using the frame backing from your picture frame, measure and mark the size of your cork tablemat. Cut along the line you've marked -using your scissors, box cutter, or X-acto knife- so that you now have a piece of corkboard that fits snuggly into your frame.
If the cork you're using isn't thick enough to sink a push-pin securely in, repeat the process so you have to pieces of cork. Using your spray adhesive (follow the instructions on your adhesive), glue the two pieces of cork together to get the desired thickness.
Step 2: Cover your cork
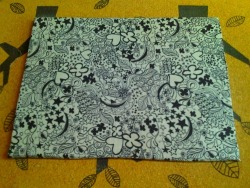
 Cut your fabric so that you have enough to cover the front of your cork and enough to secure around the back of the cork. Iron out wrinkles in your fabric, and allow it to cool.
Use your adhesive spray to stick the fabric onto the cork and to secure it to the back. Be sure to follow the bonding instructions given on the adhesive package. Smooth out the fabric quickly, before drying, to get rid of any possible wrinkles/bunches.
Step 3: Glue your cork into your frame
 Most likely, especially if using a cheap frame, you'll need to glue your fabric-covered cork into your frame - since it will be much thicker than your average picture, so the frame backing won't be able to close in as it normally would. If this is the case, here's what you do:
Using your adhesive spray, glue the frame backing to the back of your cork - be sure everything lines up evenly.
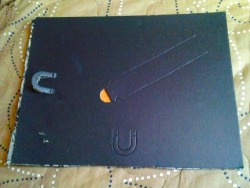
 Make sure all of the papers/liners that come with the picture frame is removed from the frame, including the glass/plastic protector. Line the inner crevice of the frame with your liquid glue and press your cork back into place - be sure not to use more glue than necessary, so it doesn't leak onto the exposed portion of the cork. Place the frame on a flat, hard surface -face down- and place a heavy book on top o fit. Allow the glue to dry.
Once you're cork is glued into your frame, you're done! Just stick your frame on the wall and add your jewelry. Your stud earrings can be poked directly into the cork. Other pieces (hoop earrings, earrings with hook backings, necklaces and rings) can be hung off a push-pin.
* For more tips and alternative materials, check out the "Frame Jewelry Board" tutorial on my DIY blog - Eat These Words.
Latest tutorials
-

DIY Grecian Goddess Hairstyle
May 17th, 2014 at 03:54am
-

How to Keep Curly Hair Healthy
May 6th, 2014 at 11:51pm
-

Female Empowering Costumes
June 26th, 2013 at 10:19pm
-

How to Keep Your Hair Healthy
April 28th, 2013 at 02:38am
-

Messy Buns
April 2nd, 2013 at 10:06pm