
How to Install Fonts On Your Computer
 Have you ever seen pretty, elaborate or crazy fonts used that you wish you had? By following these easy steps, you can learn how simple it is to install new fonts on your computer. The whole process should take no more than five minutes. However, the first thing you need to do is to pick a font to download. There are many free font websites on the internet full of custom designed fonts. Some of these include Dafont and 1001 Free Fonts.
For this tutorial, we are going to be downloading the font Cheri. For the first part of this tutorial, instructions will be the same for Windows and Mac users. To download a font, you pick the one you wish to use, click the download button and save it to a new folder that is designated for fonts. This button will be on the website. Fonts are usually small in size, and will not take up much space on your computer.
Once you have your downloaded font, you will notice that it is a zipped folder, indicated in the example below. For Mac users, you need to double click this folder and it will create and unzipped, extracted version. For Windows users, right click on the file, and click Extract All.... You will also end up with an unzipped version.
Opening the folder, you will see that there will be more than one file inside. Usually, the folders contain information on the font and the company or designer who produced it. The file type that we are looking for is called a TrueType font. This will be indicated by a blue A or two blue Ts as the symbol for the file, shown in the picture below. Right clicking the file, select Copy.
The next part of the tutorial is different for Windows and Mac users.
For Windows
Clicking the start menu, select Control Panel. For XP users, select the 'Fonts' folder. For Windows 7 or Vista users, you need to click Appearance and Personalisation. Inside, select the 'Fonts' folder, opening it.
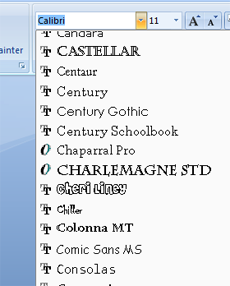
You should see something similar to the picture below. Now all you need to do is right click and Paste the font in the folder. Now that Cheri is in the folder, you can use it on your computer.
For Mac
To install the font on a Mac, it is somewhat simpler. Find the System folder icon, which is usually located in the root directory. Now all you need to do is drag the TrueType font file into the System folder. Click OK when you are prompted. Once in there, it should be automatically placed. To check this, open a word document program and check your list of fonts. If it is not there, copy the font file and open the System folder, find the folder named 'Fonts', and paste it in there.
You now have a brand new font installed on your computer! Adding new fonts to your computer can expand your options for word documents or graphic making. People are designing new fonts all the time, so don’t be afraid to try it out. Have fun with them!
Latest tutorials
-

Do Not Disturb
January 9th, 2014 at 07:12am
-

The Beginner’s Guide to Film-Making: An Introduction
April 29th, 2013 at 12:23am
-

Cheap, Free Way to Make Story Trailers.
July 28th, 2012 at 04:55am
-

How to Create Vlogs
June 26th, 2012 at 08:21am
-

How to Make a (Simple) Custom Profile Layout – Part II, CSS
May 25th, 2012 at 07:19pm